Tel: +86-19906868508
E-mail: info@sihanmed.com
Tel: +86-19906868508
E-mail: info@sihanmed.com
This article focuses on the repair of laparoscopes and analyzes their functional structure and basic working principles to accurately find faults, analyze them, and troubleshoot them.
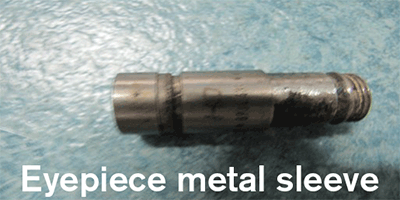
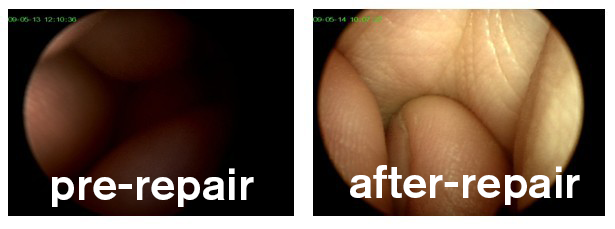
The fault of this rigid endoscope is image modulation, and the field of view is very dark. Check whether there is dirt at both ends of the endoscope, wipe the lenses at both ends with a cotton swab dipped in alcohol and observe again. The fault still exists. It was found that there were obvious dents on the outer surface of the mirror tube. First, connect the cold light source and observe that the illumination fiber is not broken. It is determined that the image is not clear due to the illumination system. Next, the mirror body is gently shaken to hear obvious sound, indicating that the internal parts are loose. It is judged that the internal optical system is damaged (rod lens and spacer ring), and it needs to be disassembled and repaired.
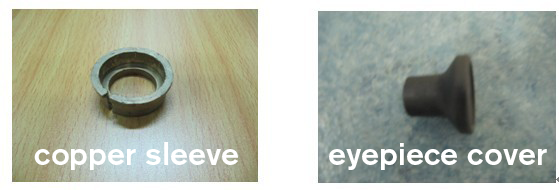
Because the external endoscopy machine parts are made of all stainless steel and is particularly precise, it is not easy to disassemble. Before disassembling, you must carefully check the approximate structure of the mirror, find the correct interface, and then start to avoid damaging its lighting system. First, use an alcohol lamp to heat the eyepiece to remove the glue, and then use a special tool (copper sleeve) to clamp the copper sleeve with a three-jaw chuck and place the eyepiece, so that the eyepiece can be removed. Because many mirrors have more glue inside, it is necessary to be more patient when opening them, and it is necessary to repeatedly and carefully. After opening the eyepiece cover, the next step is to remove the eyepiece end, but it cannot be blindly disassembled. The optical structure of each mirror is different, and it is necessary to see the cooperation and position of each part before it can be disassembled. It is also heated by an alcohol lamp. After reaching a certain temperature, use a tiger platform clamp to clamp it, and then use a large pliers to clamp the metal of the eyepiece end in the positive and negative directions to loosen the glue on it. The eyepiece can be removed, and then the rod lens can be guided out. After the endoscope is disassembled, the method of checking one by one is adopted. First, the eyepiece is not damaged, and then the front rod lens is analyzed. It is particularly important to take out the rod lens for maintenance. The direction and number of each rod lens must be marked. Each mirror has its own installation sequence. If it is messed up, it will affect its optical imaging. When taking out the third rod lens, it was found that one end of the rod lens was severely broken, and its fragments had been squeezed into the spacer ring. The cause of the fault was found. The damage of the rod lens affected the optical imaging and needed to be replaced. The matching rod lens was found and installed, and its imaging effect was observed. The matching of the optical system is very important. The role of the rod lens is to transform the image and eliminate chromatic aberration. It is used to bond the lens. When observing the object, it becomes an inverted image. The purpose is to make this rod lens conform to the imaging of the entire optical system. After repeated debugging, the optical imaging meets the requirements. This rod lens can be used, but the imaging quality is still relatively poor. The entire optical system needs to be cleaned. Use degreasing cotton, alcohol, and air blowing to clean and wipe the optical lens and hard tube in turn, and finally install and debug according to the direction. After observing the image, it achieves a clear and bright effect.
The repaired mirror needs to be dried first, then glued and fixed, and finally image printing and leak testing are performed to check that the image is normal. The fault handling work is completed.
This is the first one.
